Spring is nearly upon us, and it is a great time to get out in the sunshine and tend to those potted succulents!
Now is the time to weed - Don't sigh, you know it's time... Pull out all those bubba weeds that have shot up. Do it now, before those pots become more weed than succulent. Your plants will thank you for it.
Tidy up - Remove any dead or rotting leaves. This is especially true for your rosette types (sempervivums/echeverieas) that grow from the centre out and have old, rotting leaves on the outside and underneath the rosette. It's important to remove these to promote new growth and ensure the rot wont spread to the main plant.
Re-pot if necessary - Spring is the perfect time to re-pot those succulents that have been sitting in the same potting mix for several years, or those who's potting mix has collapsed to well below the lip of the pot. Applying a fresh mix is a great way to give your plants a new lease at life, you will be providing them with an abundant source of nutrients, and it will also help with the drainage of your potted succulent, as that old mix has probably become a little water repellent over time. Now is the time to fertilise - Speaking of nutrients, now is the perfect time to re-apply that control release fertiliser. You can also apply a seaweed or blood and bone solution to give your plants a kick start to spring.
Mulch - Mulch isn't just for the garden. Potted succulents will benefit just as much from a good layer of gravel. Not only does it make the plant 'pop' and look absolutely stunning, it also helps prevent water evaporation from the soil. It provides the roots insulation from the suns rays, which is vital in WA's intense summer heat.
Sun - Spring is the main growing season for most succulents. So make the most of it! Make sure your potted plants are receiving a decent amount of sunshine. Place them in a well lit area and they will burst into life.
Learn how to create your own simple, yet stylish succulent bonsai planter with this short tutorial video we created.
What you will need:
- Succulent plants (we used 50mm Classics)
- A large pebble
- A bonsai pot (must have a drainage hole!)
- Cacti and succulent potting mix
- Top dressing (such as gravel)
- Control release fertiliser
- Secateurs or cutters
What's great about bonsai pots is that they are shallow. Succulents tend to struggle in deeper containers, so shallow ones are the perfect size to keep their feet happy and well drained. Bonsai pots almost always have drainage holes too, which are important for succulent planters.
When choosing what plants to include, consider contrasting different heights, colours and textures.
Here we combined an upright, tall Crassula ovata 'Blue Bird', with a short growing Sedum species ground cover. The blue offers a nice contrast to the bright green and red of the groundcover, and we have both large, flat leaves and compact, tiny leaves in our combo.
Use a good quality, cacti and succulent mix. I can't stress this enough. Your normal potting mix retains too much water for succulents; they need more drainage than a normal mix can provide. You can improve the drainage of a cacti and succulent potting mix further by incorporating perlite into the mix.
It is up to you what top dressing to use. We used a fine grade black gravel, but other good toppings include pea gravel, fish tank pebbles or even sphagnum moss. Not only does the top dressing look fantastic and finish off a beautiful project like this, it helps protect the soil from the elements. It can keep the plants roots cool in summer as well as warm in winter.
Include a control release fertiliser into the mix when your planting your bonsai pot and that will keep your plants happy for at least 6 months. You can also use a seaweed solution or blood and bone solution to give them a kick start.
Care Information:
You can keep your bonsai planter either inside next to a window, or outside in a part shade position. It can be put in a full sun position once it has become established, but may still need to come under the verandah on extreme summer days.
Water your bonsai planter once a day in the summer or a little less often if keeping indoors. You can cut watering right back during winter to once a week, even once a fortnight depending on its location.
Prune often to keep compact and lush. This will also help to give the 'Blue Bird' a bonsai tree appearance.
Get succulents and supplies for your next succulent project at www.fickleprickles.com.au.
Delivery to anywhere in Western Australia.
It's winter! And do you know how we can tell? Because of the stunning colours that come out in our succulent babies! we just have to show everyone the colours that are coming out in Sedum makinoi 'Limelight' at the moment:
Usually lime green in colour (hence the name limelight), these little beauties are showing some amazing golds, burnt oranges and even browns in this cold weather. Such a stark contrast to the bright green colour you see in the foliage during spring and summer:
We have been receiving a lot of queries as to the physical differences between a Crassula capitella and a Crassula capitella ssp. thyrsiflora - So we thought we would share this comparison photo! Crassula capitella ssp. thyrsiflora is commonly known as 'Red Pagoda'.
It has quite small triangular leaves that stack just like the original capitella, but just on a smaller scale. The plant itself is more compact, and will mass and clump into a mound no bigger than 10-15cm.
Thyrsiflora has olive green leaves that turn a dark burgundy colour with age.
Crassula capitella is a larger plant, that can grow up to 15cm tall (and sometimes taller).
The leaves themselves are wider and more fleshy, and don't grow as compact as the thyrsiflora.
The colours of the capitella are stunning, with shades of vivid pink and red coming through with age. The colours intensify in the cooler months.
Both are geometrically amazing to look at, and look wonderful in potted succulent gardens.
We are very excited to be attending the Perth Garden Festival again this year. Located at Mcallum Park in Victoria Park, PGF2017 will run over 4 days from Thursday 27th April to Sunday 30th April.
What's on offer?
This year, expect to see new varieties in all our ranges that are yet to be seen on our website, with bulk buy offers available. We will have cacti, lithops and larger succulents on offer, as well as a new range of miniature houses and furniture that we will be launching at the festival!
A sneak peak of the Classics that will be available at the festival.
Sun loving collectables
as well as collectables that prefer shadier positions.
Larger Succulents and Cacti will be available.
and Large Stapeliae too... This one is just about to flower!
A wide range of cacti...
and lithops too!
We will also be introducing a new range of miniature houses and cottages at the festival.
Displays!
We have been busy bees planning our display for this year, which will have a strong focus on miniature gardens. Hopefully it will provide ideas and inspiration on how to incorporate succulents, perennials and miniature gardens into your home and backyard! See photos of our under the sea display from last year!
To find out more about the Perth Garden Festival 2017, head on over to their website: perthgardenfestival.com
Succulent miniature gardens are not just for the little ones, us big kids get a kick out of creating and admiring miniature landscapes too. And why not, when in these times limited space in the backyard and limited budgets prevent us from making life size landscape gardens, these miniature creations are a great way to get those creative juices flowing and to get those green thumbs to work!
Although it seems logical to start the planning of a miniature garden with your plant selection, we have actually found that choosing your accessories first helps with the plant selection process. So with that in mind, here are some accessory tutorials we found online that we personally can't wait to try out:
Lesley Shepard on about.com shows you step by step how you can create a mini fence with just wire and a pair of pliers. So simple, and yet so effective. I like how this fence doesn't have to be in a straight line, it can be curved around to match your miniature garden edging. This could work well around a lawn made from Sedum lydium. Pure magic!
If you prefer something a touch larger and more solid, then Lesley Shepard also has a tutorial on how to make a petite picket fence or gate using Popsicle sticks. I honestly thought cutting the top shape out of a pop stick would be too tricky, but Lesley is one clever lass and instead uses a small file to make an indent either side of the stick. Clever. A coat or two of paint and you have yourself a miniature white picket fence! You could pair this up with mini shrub type succulents, like A. 'Irish Bouquet' or Sempervivum 'Hen and Chicks' .
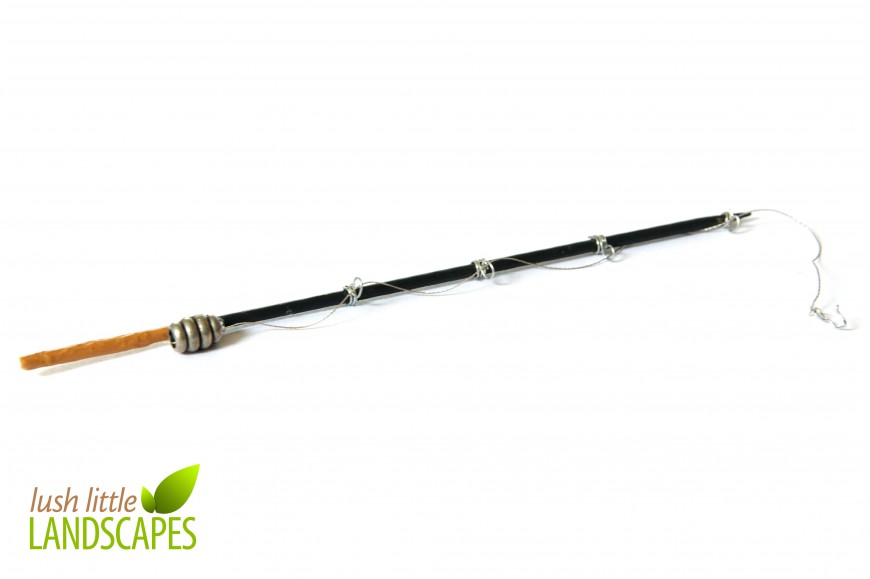
This was too cute to pass by, and although the idea of a seaside/swamp miniature garden hadn't really crossed my mind just yet, this mini fishing rod is surprisingly simple to make. Lush Little Landscapes provides step by step instructions on how you can make you own using a skewer, fishing line, wire and some small buttons for the reel. Maybe a jetty made out of pop sticks to accompany it? And for a swamp like succulents, Bergeranthus multiceps would make a great clump of reeds.
And for something a little more challenging, why not make this house which comes complete with a door, a window and a very cute sconce on the front. thejuise.blogspot.com.au gives step by step instructions on how you can make your own house with just sticks and a hot glue gun. This house was made from Cherry tree branches, but I think eucalyptus sticks will give it that touch of 'Australiana'. A tree next to it, like a Crassula tetragona perhaps?
So we hope these great ideas inspire you to create your own succulent miniature gardens, and help with the choosing of your miniature garden plants. Happy projecting!
A succulent wreath is simply a wire frame filled with sphagnum moss and a selection of succulent cuttings (and yes, they are real plants!).
You can hang them up on a wall, or on your front door, or lay them flat and use as a stunning table centre piece. They are incredibly easy to make and if watered regularly, can last for many years. Amaze your friends with your very own living piece of art! Here's how to get started.
What you will need:
A wreath wire frame
Sphagnum moss
Fishing Line
A selection of succulent cuttings or small rooted plants
A chop stick
The wire frame, sphagnum moss and the succulent plants can all be purchased from Fickle Prickles. The thin wire will be available at your local independent hardware store (support your local independents!).
How to assemble:
1. Hydrate your Sphagnum moss. Sphagnum moss comes dehydrated, and to use it in your succulent projects, simply add water and watch it rehydrate. 2. Fill up your wire frame. Simply take small handfuls of the hydrated sphagnum moss and mold it on top of your wire frame. Be very generous with the moss as you want your base to be quite solid so the roots of your plants have something to take hold of. Aim for a mound that is about 8cm tall.
3. Tie it on. Using the fishing line, secure the moss by wrapping it around both the frame and moss. Work your way around the frame until it is nice and secure. The wonderful thing about fishing line is that it is invisible, so you can use quite a bit without ruining the aesthetics of the project :)
4. Clean it up. Tuck in any straggly, loose pieces of sphagnum moss.
5. Prepare your succulents. You can use cuttings consisting of the tips of your succulents, or you can also use rosettes. Combine as little or as many different species in your design, the choice is yours. To prepare them, simply remove some of the lower leaves so you have a stem of around 1.5cm - 2cm. You can also use small succulents with roots (about tubestock size). Simply remove them from the pot and trim the root ball to a manageable size for your wreath. What's great about using rooted succulents is that the time it takes to establish your wreath is far less than if you use cuttings. 6. Plant your succulents. Use your chopsticks to make a small hole and simply place the stem of your cutting into the hole. repeat until the frame is full. TIP - Create 'U' shaped pins from wire to secure cuttings into place.To plant in tubestock succulents with root balls, follow the same process, just make the hole a little bigger.
7. Grow them up. Lay your wreath flat until your cuttings are well rooted. This will take around 4 - 6 weeks, depending on the time of year. Keep watering them regularly during this time and don't allow it to dry out. Once established (give your cuttings a little tug and of they don't budge, they are established), hang up the wreath onto your favourite outdoor wall or lay flat and use as a table centre piece.
8. Maintenance. Keep your wreath in a partial shade position - This will help to stop your wreath drying out too quickly. Water your wreath once a day, and water thoroughly. Prune your wreath regularly to encourage new growth and keep your wreath nice and densely covered. You can fertilise your wreath with a seaweed and blood and bone solution, which you can buy from your local nursery. Use as directed.
As you can see, it is quite simple to make a beautiful piece of living art! And it an art piece that will keep on giving year after year with regular watering, fertilising and pruning.
UPDATE:
Here is a little video of me creating my first succulent living wreath. Kaye usually creates all the wonderful wreaths we sell at the Perth Garden Festival, and so I thought I would share with you a novice's attempt at a small wreath to PROVE just how easy it can be :)


/about/line-up-top-56a627315f9b58b7d0e02f14.jpg)
/about/cfstckbedstrt-56a6202b3df78cf7728b7b66.jpg)