02 November, 2016

4 DIY miniature garden accessories to try!


Succulent miniature gardens are not just for the little ones, us big kids get a kick out of creating and admiring miniature landscapes too. And why not, when in these times limited space in the backyard and limited budgets prevent us from making life size landscape gardens, these miniature creations are a great way to get those creative juices flowing and to get those green thumbs to work! 

Although it seems logical to start the planning of a miniature garden with your plant selection, we have actually found that choosing your accessories first helps with the plant selection process. So with that in mind, here are some accessory tutorials we found online that we personally can't wait to try out:


Lesley Shepard on about.com shows you step by step how you can create a mini fence with just wire and a pair of pliers. So simple, and yet so effective. I like how this fence doesn't have to be in a straight line, it can be curved around to match your miniature garden edging. This could work well around a lawn made from Sedum lydium. Pure magic!


If you prefer something a touch larger and more solid, then Lesley Shepard also has a tutorial on how to make a petite picket fence or gate using Popsicle sticks. I honestly thought cutting the top shape out of a pop stick would be too tricky, but Lesley is one clever lass and instead uses a small file to make an indent either side of the stick. Clever. A coat or two of paint and you have yourself a miniature white picket fence! You could pair this up with mini shrub type succulents, like A. 'Irish Bouquet' or Sempervivum 'Hen and Chicks' .


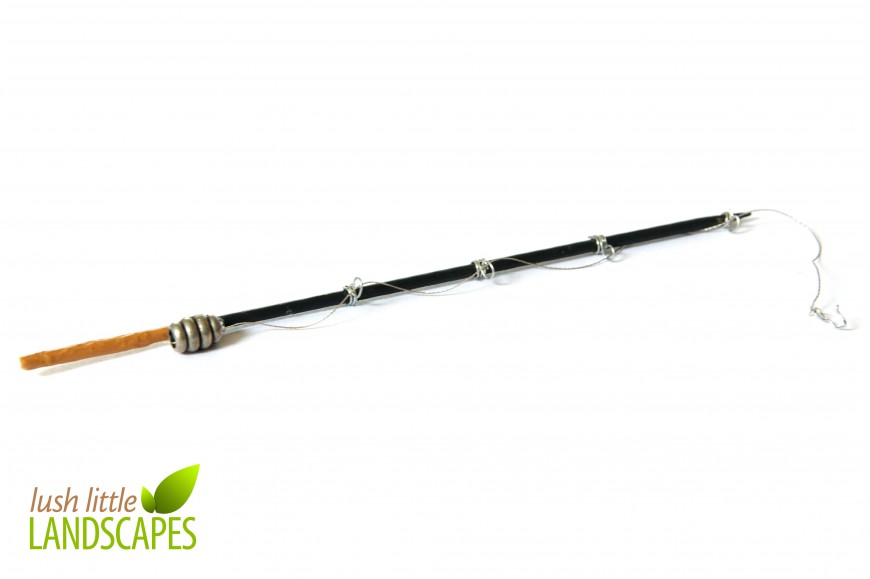
This was too cute to pass by, and although the idea of a seaside/swamp miniature garden hadn't really crossed my mind just yet, this mini fishing rod is surprisingly simple to make. Lush Little Landscapes provides step by step instructions on how you can make you own using a skewer, fishing line, wire and some small buttons for the reel. Maybe a jetty made out of pop sticks to accompany it? And for a swamp like succulents, Bergeranthus multiceps would make a great clump of reeds.


By Juise

And for something a little more challenging, why not make this house which comes complete with a door, a window and a very cute sconce on the front. thejuise.blogspot.com.au gives step by step instructions on how you can make your own house with just sticks and a hot glue gun. This house was made from Cherry tree branches, but I think eucalyptus sticks will give it that touch of 'Australiana'. A tree next to it, like a Crassula tetragona perhaps?

So we hope these great ideas inspire you to create your own succulent miniature gardens, and help with the choosing of your miniature garden plants. Happy projecting!


31 August, 2016

How to make a Succulent Wreath


A succulent wreath is simply a wire frame filled with sphagnum moss and a selection of succulent cuttings (and yes, they are real plants!).
You can hang them up on a wall, or on your front door, or lay them flat and use as a stunning table centre piece. They are incredibly easy to make and if watered regularly, can last for many years. Amaze your friends with your very own living piece of art! Here's how to get started.

What you will need:

A wreath wire frame
Sphagnum moss
Fishing Line
A selection of succulent cuttings or small rooted plants
A chop stick
The wire frame, sphagnum moss and the succulent plants can all be purchased from Fickle Prickles. The thin wire will be available at your local independent hardware store (support your local independents!).

How to assemble:

1. Hydrate your Sphagnum moss. Sphagnum moss comes dehydrated, and to use it in your succulent projects, simply add water and watch it rehydrate.

2. Fill up your wire frame. Simply take small handfuls of the hydrated sphagnum moss and mold it on top of your wire frame. Be very generous with the moss as you want your base to be quite solid so the roots of your plants have something to take hold of. Aim for a mound that is about 8cm tall.


3. Tie it on. Using the fishing line, secure the moss by wrapping it around both the frame and moss. Work your way around the frame until it is nice and secure. The wonderful thing about fishing line is that it is invisible, so you can use quite a bit without ruining the aesthetics of the project :)

4. Clean it up. Tuck in any straggly, loose pieces of sphagnum moss.

5. Prepare your succulents. You can use cuttings consisting of the tips of your succulents, or you can also use rosettes. Combine as little or as many different species in your design, the choice is yours. To prepare them, simply remove some of the lower leaves so you have a stem of around 1.5cm - 2cm. You can also use small succulents with roots (about tubestock size). Simply remove them from the pot and trim the root ball to a manageable size for your wreath. What's great about using rooted succulents is that the time it takes to establish your wreath is far less than if you use cuttings.

6. Plant your succulents. Use your chopsticks to make a small hole and simply place the stem of your cutting into the hole.  repeat until the frame is full. TIP - Create 'U' shaped pins from wire to secure cuttings into place. To plant in tubestock succulents with root balls, follow the same process, just make the hole a little bigger.


7. Grow them up. Lay your wreath flat until your cuttings are well rooted. This will take around 4 - 6 weeks, depending on the time of year. Keep watering them regularly during this time and don't allow it to dry out. Once established (give your cuttings a little tug and of they don't budge, they are established), hang up the wreath onto your favourite outdoor wall or lay flat and use as a table centre piece.

8. Maintenance. Keep your wreath in a partial shade position - This will help to stop your wreath drying out too quickly. Water your wreath once a day, and water thoroughly. Prune your wreath regularly to encourage new growth and keep your wreath nice and densely covered. You can fertilise your wreath with a seaweed and blood and bone solution, which you can buy from your local nursery. Use as directed.


As you can see, it is quite simple to make a beautiful piece of living art! And it an art piece that will keep on giving year after year with regular watering, fertilising and pruning.


UPDATE:

Here is a little video of me creating my first succulent living wreath. Kaye usually creates all the wonderful wreaths we sell at the Perth Garden Festival, and so I thought I would share with you a novice's attempt at a small wreath to PROVE just how easy it can be :)


See our blog post 'My First Succulent Wreath' for more info on this particular project.

19 February, 2016

A Winner has been Chosen!


We were completely inundated with photo entries to our DIY Valentine's Day Competition - You are all so very talented! It makes our job deciding a winner that much harder.

We are very pleased to announce that the winner of a $20 Fickle Prickles voucher is Sharon from Willetton! Congratulations to Sharon, who created this very cute Valentine's terrarium.

We would like to thank everyone who entered, and hope that your loved ones enjoyed all of your DIY succulent creations.

01 February, 2016

4 Delightful DIY Succulent Valentine Ideas!


Skip the chocolates this year, and those expensive flower arrangements that only last a week - Give your Valentine a special gift that will last! We have found 4 really simple, yet incredibly adorable Valentine's gift tutorials that your special someone will love!


So this year, say I love you with a gift they will never forget. Happy Projecting!
Be sure to check out our latest Valentine's article - 4 More DIY Succulent Valentine Ideas - for more gift ideas and tutorials.