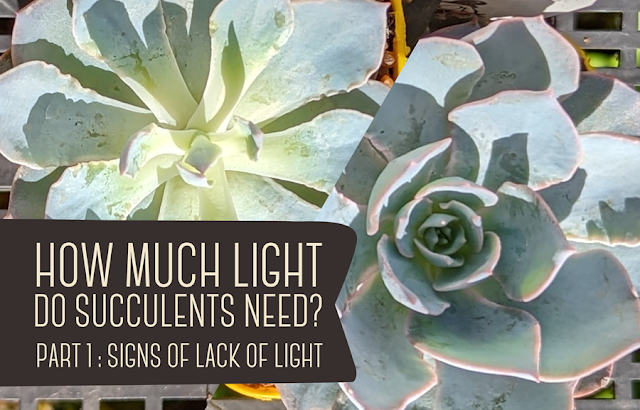
How much light do succulents need? Part 2 – Is
there such a thing as too much light?
I recently
conducted an experiment keeping succulents under various light conditions. 3
identical sets of plants, one set kept in a dark room, one under some artificial
grow lights, and one grown as a control in the stable conditions of our
succulent nursery. The purpose of the experiment was to provide some side by
side photos in order to help point people in the right direction about finding
the ideal spot at home to grow succulents.
In part 1
of this story, I discussed the results of the plants grown in a dark room.
After 7 days, the succulents starting showing signs of lack of light and by day
12 they looked quite light deprived compared to the control plants. If you would
like to view the results of that comparison, and see some tips on how to
rectify the symptoms of lack of light in succulents, please head to Part 1:
Signs of Lack of Light.
In part 2,
I want to talk about the plants I kept under artificial grow lights. Now, I
chose to add this to the experiment, because keeping succulents in an indoor
location can be impractical if they don’t receive enough light in that room. By
adding a grow light to your indoor succulents, you can supplement that indirect
light it receives thorough a window, and you can successfully keep a nice,
healthy compact plant indoors.
But for how long each day should you have this
grow light on for?
This is the question I wanted to answer by placing these plants under these
lights. And thus, the experiment continues!
Now, if you
would like to get into the science of how grow lights work, including the light
spectrum, different wavelengths/colours, LED vs incandescent, it’s a big
subject you can really sink your teeth into, and I do recommend delving into
that rabbit hole if you have time. However for this experiment, I’m keeping it
simple – I actually used an aquarium light passed on to me from my partner who
really likes to keep fish. I confess, it’s a rather cheap light. I don’t have
too many specs on it, only that it is 24w LED, and they are white coloured
LED’s. I’ve germinated seeds under this light before and I’m very happy with
the results.
THE EXPERIMENT
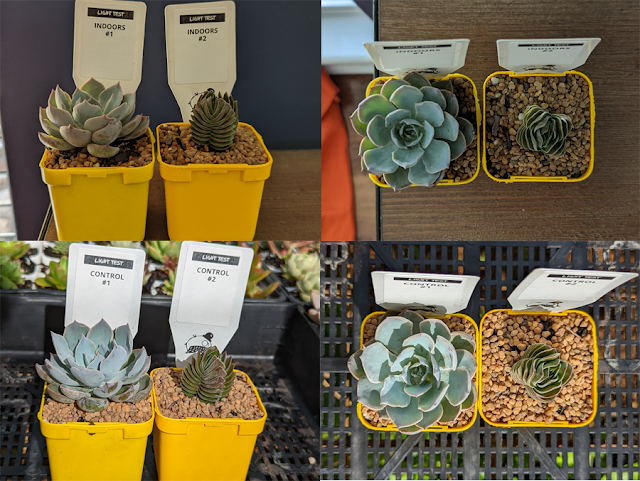
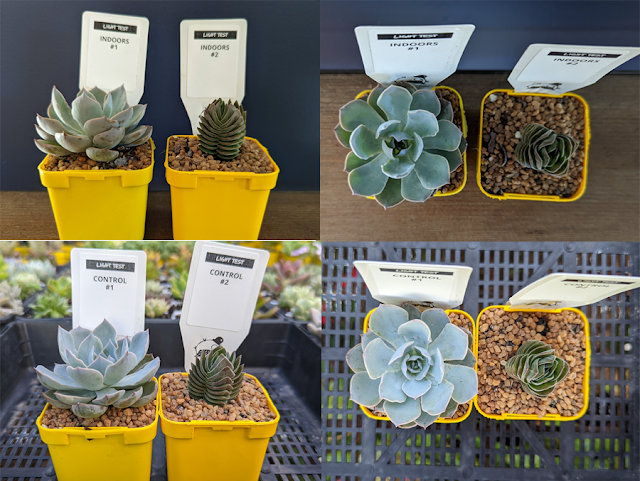
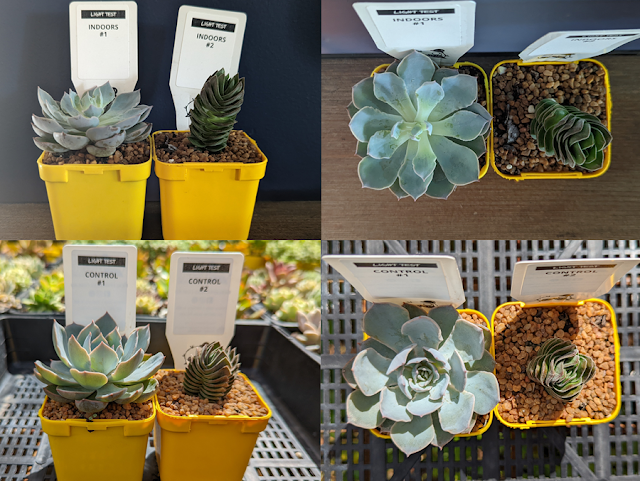
The Plants
Just as a
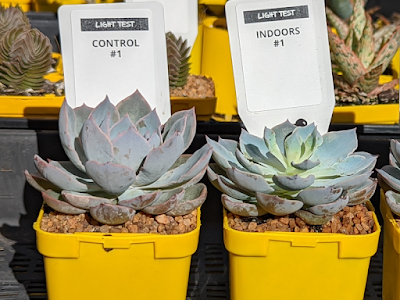
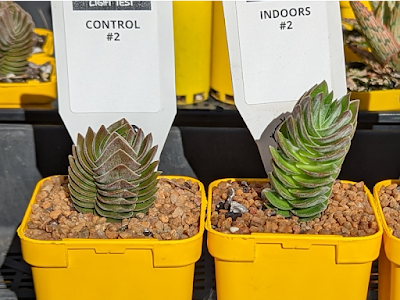
reminder, the succulents I chose for this experiment were ‘Echeveria Morning
Beauty’ and Crassula ‘Buddah’s Temple’. I chose the Morning Beauty because of
its bright blue colour, and for its rosette shape, the Buddah’s Temple I chose
because its deep green colour, and its upright growth habit.
The Conditions
All the
plants were from the same batches – They were the same age, same potting media,
same pot size, and had the same watering schedule up until the start of the
experiment.
The control plants in this experiment were placed out in the nursery, and they received about 8 hours of sunlight per day. They were under hail net which filters out a small fraction of light. They were watered every day, as I conducted this experiment at the end of summer.
The indoor
plants were kept in a room I know to be too dark to grow succulents. Although
next to a window, the indirect light was just too filtered to be sufficient for
healthy growth. They were watered every second or third day.
The grow
light plants were placed inside a glass tank, with the LED bar light about 25cm
above them. They were watered every second or third day.
I kept this light on in this tank for 24 hours
a day for the duration of this experiment.
The reason
why? To see whether there is such a thing as ‘too much light’. I’ve read up on the idea of light toxicity and
the detrimental effect it can have on
plants, and Kaye tells me it does exist (She is the horticulturalist in the
family, who am I to disagree…) BUT, I just really wanted to see the results for
myself.
THE RESULTS
Day 1

Day 3

Day 7

By day 7
there still weren’t too many differences in the plants – All 4 plants were very
healthy. In fact, the Morning Beauty under the 24 hour light was doing far
better than I could have expected. The foliage was strong and the rosette nice
and compact. No signs of light toxicity at all.
Day 12

It was by
Day 12 that I was really impressed. Both plants under the 24 hour light were
absolutely thriving. The blue colour in the Morning Beauty was so intense.
Day 15 –
The final Comparison


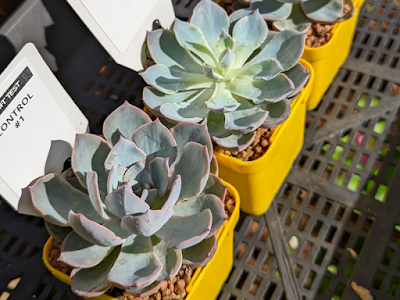
Wow. Very
unexpected results. Putting all 6 plants in this experiment side by side to
compare made the results very clear. No light toxicity to be seen! The intense
blue colour in the Morning Beauty kept under the grow lights is just stunning.
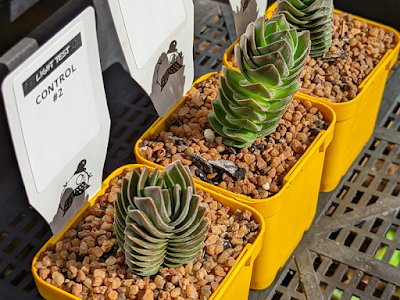
The Buddah’s Temple faired well too, however the control is just a tad more sun
hardened, you can see that by the bronze colour it shows.
So, if you
have succulents you wish to place indoors, in a spot that may be a tad too dark
for healthy growth, definitely think about using a grow light. As for how long
to keep the light on for each day, I would start at the basic 8 hours of light
per day to mimic the sun’s behaviour. You can always increase of decrease it
based on the look of your plants. Timers work great so you don’t have to
remember to switch them on every day, and I like to offset the 8 hours and run
my lights from noon to 8pm, so I can enjoy seeing my succulents all lit up in the
evening.
Read Part 1 of this Experiment,